KLR Suggested Upgrades
If you want to drive your Perentie into the 21st century, then KLR have some well proven upgrade paths that will future proof and transform your 1980s/90s Perentie into a majorly serious vehicle, capable of tackling just about anything you want to throw at it and best of all, it will still be a fully functioning and very capable machine well into the future, while many other 4wds will be a pile of rust!
If you need help or advice about any on these upgrades, then drop us a line on our Contact page, or give KLR a call during business hours and we'll help you find the right solution to create your ultimate Perentie.
So here we go….
 Basic Functionality - Doors & Ignition Lock
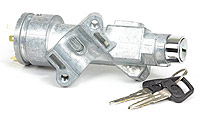
First on the list and cheap to implement would be to install door locks and a modern Land Rover ignition keyed switch with steering lock. Not only does this help to keep joy riders out, but gives you peace of mind as to who can turn the engine over. And in some states this is a legal requirement to be installed.
----------------------------------------------------
For some the Perentie can feel a little heavy in the steering, especially in a car park and usually after your first three-point turn.
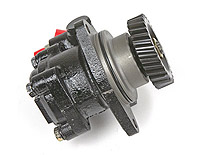
A simple fix is to replace the steering box with a well proven and easy to install power steering kit from KLR
Our power steering kit consists of all the new components necessary to fit power steering to your Perentie 4×4:
• New 4-bolt Adwest steering box or Land Rover Factory reco Adwest box
• New pitman arm and ball joint
• New power steering pump
• New reservoir
• New hoses and fittings
• New reservoir brackets and bolts
Installation is straightforward for those with mechanical experience and takes about two hours. No modifications are necessary; this is a true bolt-on kit. Even the mounting holes for the reservoir bracket are already there!
----------------------------------------------------
The naturally aspirated 4BD1 will pull all day long and is unrivalled off road, but it is a bit lethargic by today’s standards on the road.
Fortunately this is easily fixed with the addition of a turbo.
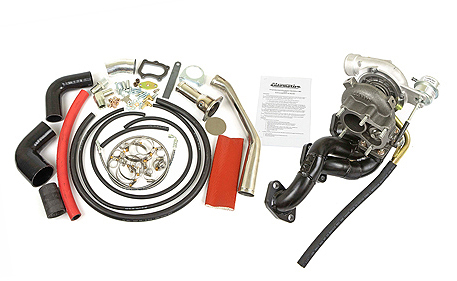
Our turbo kit, using a genuine Garrett turbo, almost doubles the engine output for the same fuel consumption.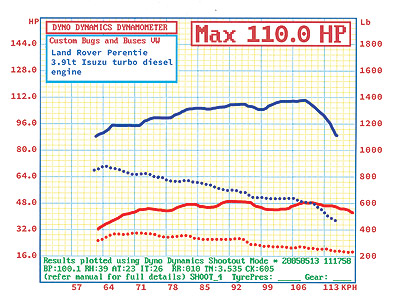
This dyno chart shows the power increase from 49Hp (red line) to 110Hp (blue line) at the rear wheels (the power figure is on the left hand side). The dotted lines are the respective torque figures. This is a typical result with our kit.
We have been fitting turbos to the 4BD1 for over 20 years and in that time have tested many set ups. In general any turbo is better than no turbo, however some deliver better results than others. The mistake many installers make is to use a turbo that is too big – it will deliver great boost at high revs but most drivers don’t rev their engines that hard. The 4BD1 has a limited rev range – it is usually governed to 3400rpm, however you rarely need to rev them past about 2500rpm (and usually a lot less). None of the factory fitted turbos are worth using.
A correctly matched turbo delivers excellent boost pressure off idle, so there is even less reason to rev the engine hard since more torque is being produced lower in the rev range. This results in better economy, quieter operation and a smoother driving experience (and much more torque and power across the rev range).
The complete kit contains everything necessary for installation:
• Garrett GT series turbo and base gasket
• High flow tubular manifold (yes it makes a difference)
• Crossover pipe and hoses and adaptors
• Intake hose
• Oil feed and oil return hoses and fittings
• Engine breather modification fittings and hose
• EGT probe pick-up
• Nuts, studs and hose clamps
Installation is a DIY proposition for those with experience – some welding and drilling is required, not to mention the use of a wide range of hand tools. Tuning should be done with the aid of a pyrometer or dyno (or preferably both). Our new injection pump setting tool makes tuning even easier – usually a two minute job with a couple of test drives. A fitting guide is included and we are available for technical support.
NOTE: Each kit now comes with an injection pump setting tool. This makes tuning our turbo kit even easier than before and eliminates any margin for error.
This tool is also available for no cost to those who have already fitted our kit.
Most people have their own preference for an exhaust system however we can also give you advice on this. The original air cleaner is modified and retained. This turbo kit will also fit FFR and other variants fitted with a 24v generator. This kit will also fit the civilian 110 County. It will also fit the 6×6 variants as an upgrade to the existing low-mount Garrett turbo.
Gauges
We use, sell and recommend the Scintex EGT kit with any turbo conversion. This compact unit can be flush mounted into a dash panel, or comes with its own box for above-dash mounting. The unit can be programmed for different overheat alarm levels, and can be connected to external warning buzzers or lights. The readout is a bright red digital display easily seen in daylight.
We also recommend fitting a capillary (mechanical) type water temperature gauge – these are more accurate and more reliable than electric gauges.
KLR Installation
Of course we also offer a full turbo installation and tuning service for those not tempted to tackle this task.
----------------------------------------------------
Clutches ain’t Clutches
The standard clutch as fitted to the 4×4 can only be described as barely adequate. Isuzu and Land Rover knew this and fitted a “heavy duty” one to the 6×6 with the turbo motor.
This clutch is also underwhelming; it offers a paltry 20% increase in clamping force over the standard clutch.
We see regular failures with both. This was fine for Defence; the taxpayer pays for replacements.
You however, only want to pay for one clutch in your vehicle.
Our clutch kit offers almost double the clamping force of the standard clutch with the same pedal effort as the 6×6 clutch.
So when you buy a 'heavy duty' clutch, make sure it is, and not just the 6×6 clutch. It might cost a few dollars more now, but you won’t need to do it a second time, regardless of any other modifications you make.
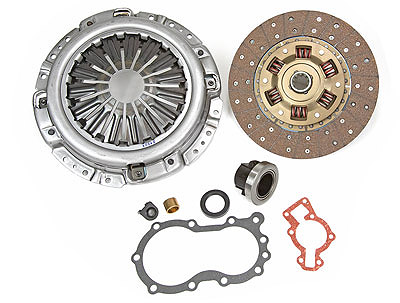
Our clutch kit, which we fit to both 4×4 and 6×6 Perenties, consists of the drive plate, pressure plate, throwout bearing and spigot bush.
We recommend machining the flywheel.
----------------------------------------------------
 Clutch Master & Slave Cylinder
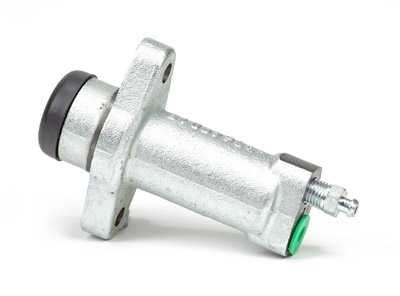
We have had a large number of failures with clutch slave cylinders. It appears they are corroding and pitting from standing around and eventually leaking into the bell housing.
To check yours, simply remove the wading plug in the bell housing and catch whatever fluid comes out. If it's brake fluid you need a new slave cylinder.
And while you’re at it, we recommend swapping out the clutch master as well, because just like old light bulbs, there’s a very good chance the master will fail not long after the slave does!
----------------------------------------------------
Bring your Perentie into the 21st century with a rear disc brake conversion. This kit replicates the brakes on the rear of the Defender, but uses a 4-pot caliper for extra stopping power (as used on the 6×6). It is a true bolt-on kit that is made up of all new parts:
• Calipers
• Hubs
• Discs
• Wheel bearings and hub seals
• Brake Pads
• Caliper Brackets
• Bolts, lock tabs and pad retention kit
Fitting this kit also converts the rear wheel bearings to run in diff oil – the way they were meant to. Installation is straight forward, taking about three hours. The brake system will need to be bled. The original half shafts, drive flanges, brake master cylinder and original brake pipes are all retained.
----------------------------------------------------
The rear axles in the 110 Salisbury diff were far superior to the later Defender types, however they will flog out over time. We highly recommend fitting MaxiDrive replacement axles.

----------------------------------------------------
 Gearbox
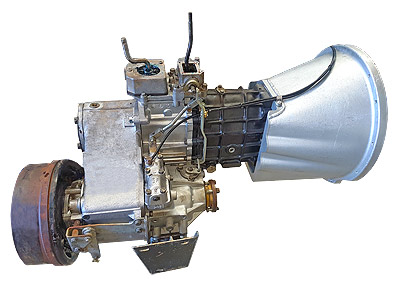
The LT95 gearbox and transfer case assembly is a strong unit, but can get expensive if a complete overhaul is required.
The Isuzu can be hard on gearboxes, however we have found the 5 speed R380 and LT230 to be an excellent alternative – five equally spaced ratios without big jumps, smooth change, cheap and easy to overhaul.
The added bonus is they handle the torque of the Isuzu very well.
Conversion is a big job but we can advise you of the details, starting with our modified bell housings and clutch kit to suit.
